How to Solve reCAPTCHA v2 in n8n Using CapMonster Cloud
If you automate processes in n8n, you have probably encountered this situation: a workflow stops because the website requires a reCAPTCHA v2 verification. Until a token is obtained, the workflow cannot continue.
Instead of solving the CAPTCHA manually or looking for workarounds, simply add the CapMonster Cloud node to your workflow. It sends the CAPTCHA for solving and returns a ready-to-use token. Pass this token in the next request – and the workflow will continue automatically without any additional action on your part.

How the CapMonster Cloud Node Works
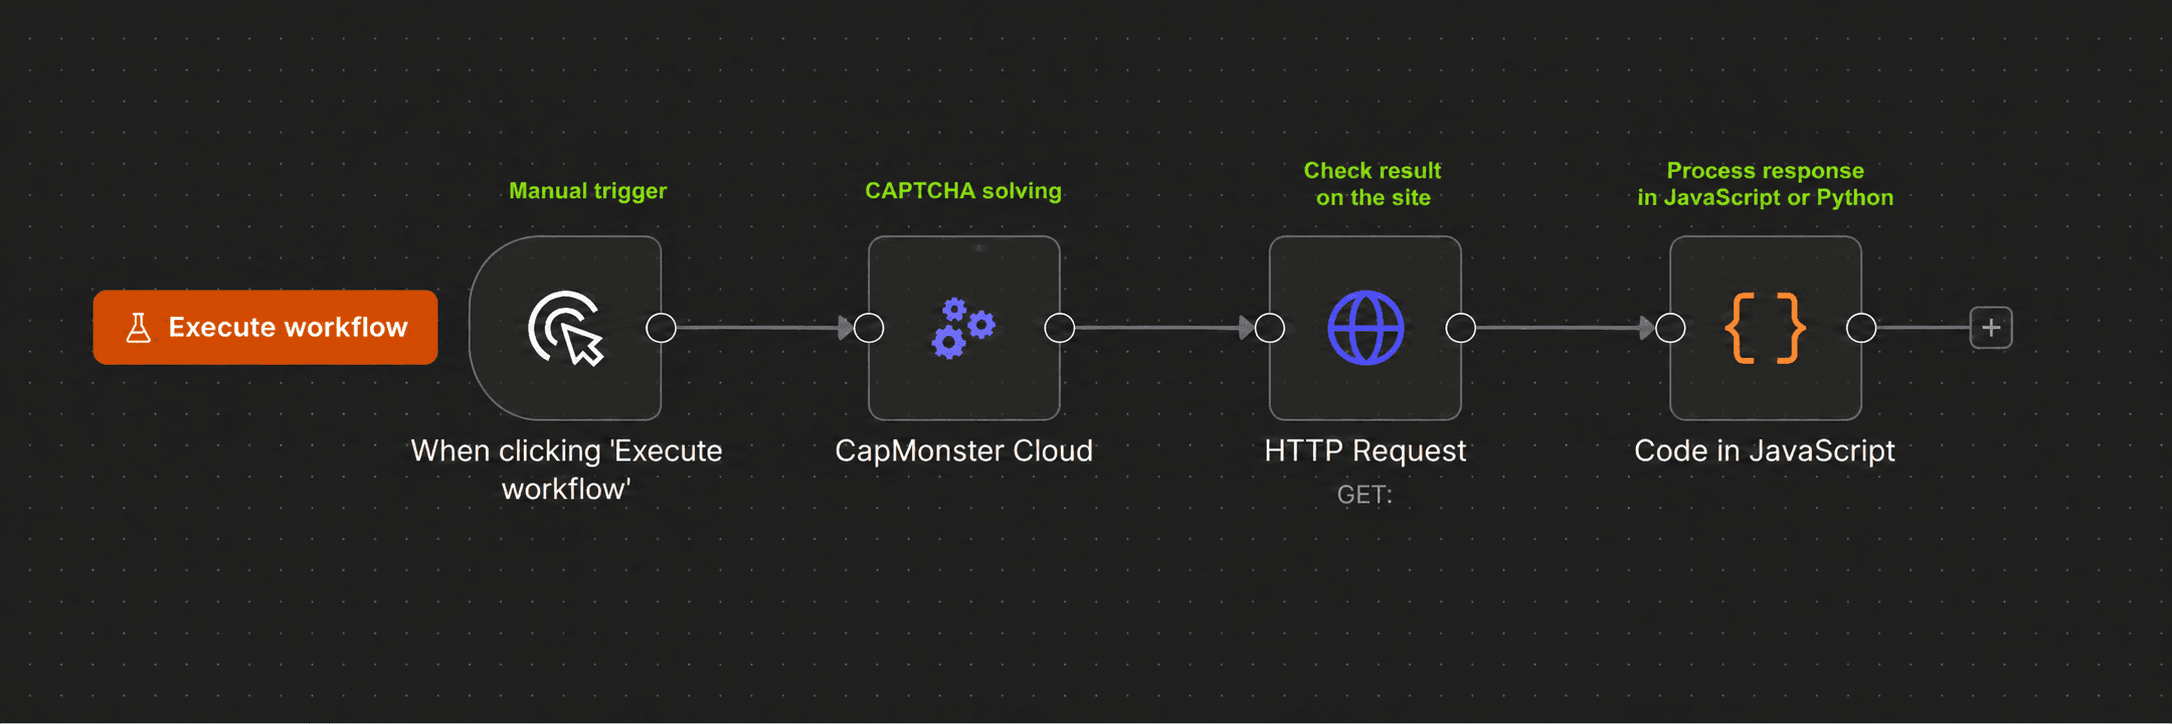
The CapMonster Cloud node automates task submission and result retrieval. First, you specify the CAPTCHA parameters manually or obtain them at an earlier stage of the workflow. The CapMonster Cloud node then submits the task for solving and returns a ready-to-use token or another result.
You can then use the result in the next node or action – for example, to submit a form, send an HTTP request, or continue interacting with the website.
A basic CAPTCHA-solving workflow may look like this:
What You Need
Before you begin, we recommend reviewing the CapMonster Cloud documentation.
Before configuring the integration, make sure you have:
- an n8n account or a running n8n instance;
- a CapMonster Cloud account;
- a CapMonster Cloud API key;
- a positive account balance.
During the configuration process, you will also need:
- the URL of the page containing reCAPTCHA v2;
- the sitekey;
- the parameters of the request in which the obtained token will be used.
The following sections explain how to obtain and configure these values.
Install the CapMonster Cloud Node
Installation from the Nodes Panel
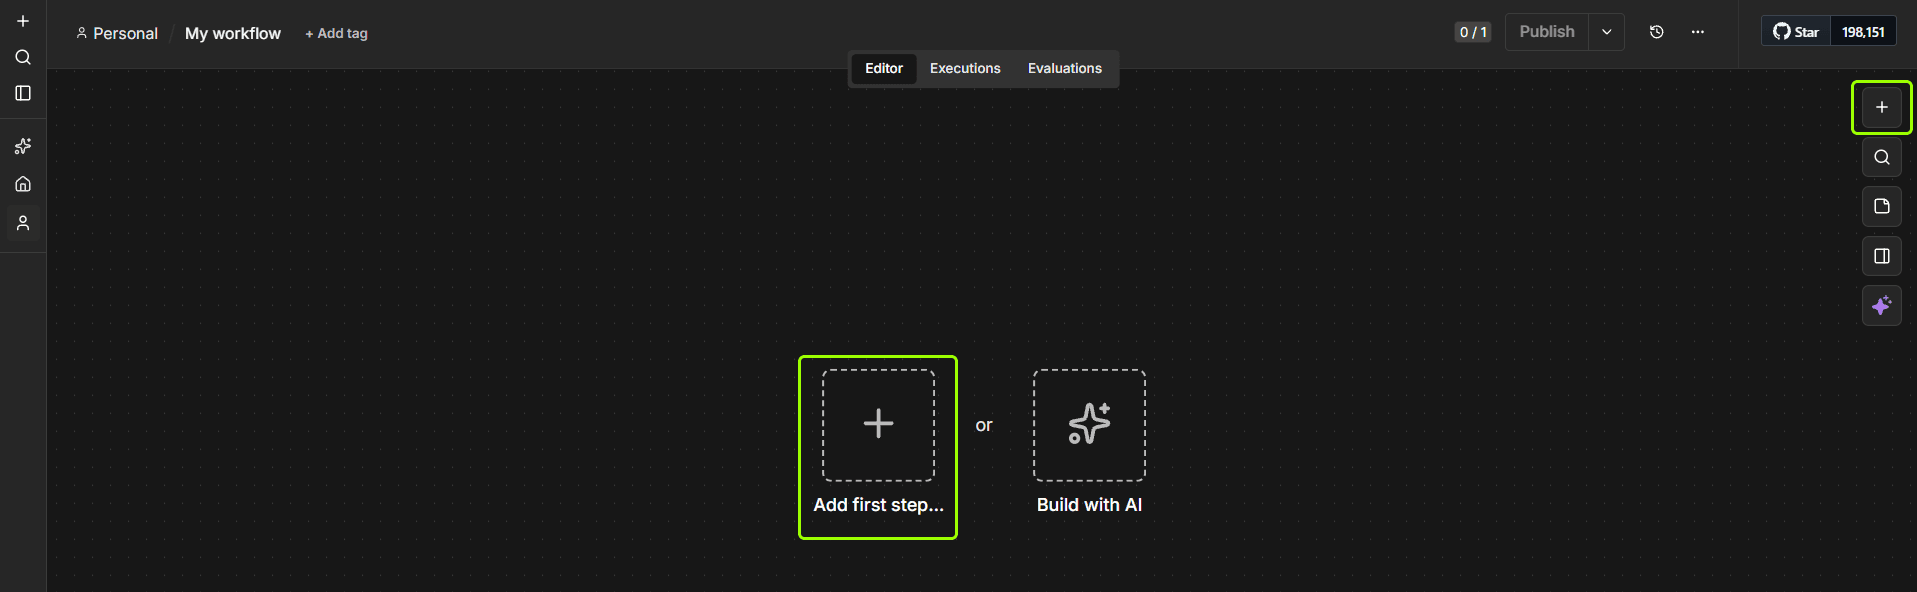
Open your workflow and click Add first step... or the + button.
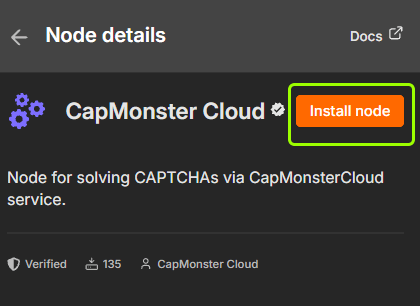
Enter CapMonster Cloud in the search bar.
Select the node from the search results and click Install node.
Installation via npm
For self-hosted n8n instances, you can install the node manually via npm.
Stop n8n, open a terminal, and run:
mkdir -p ~/.n8n/nodes
cd ~/.n8n/nodes
npm init -y
npm install @zennolab_com/n8n-nodes-capmonstercloud
Then restart n8n.
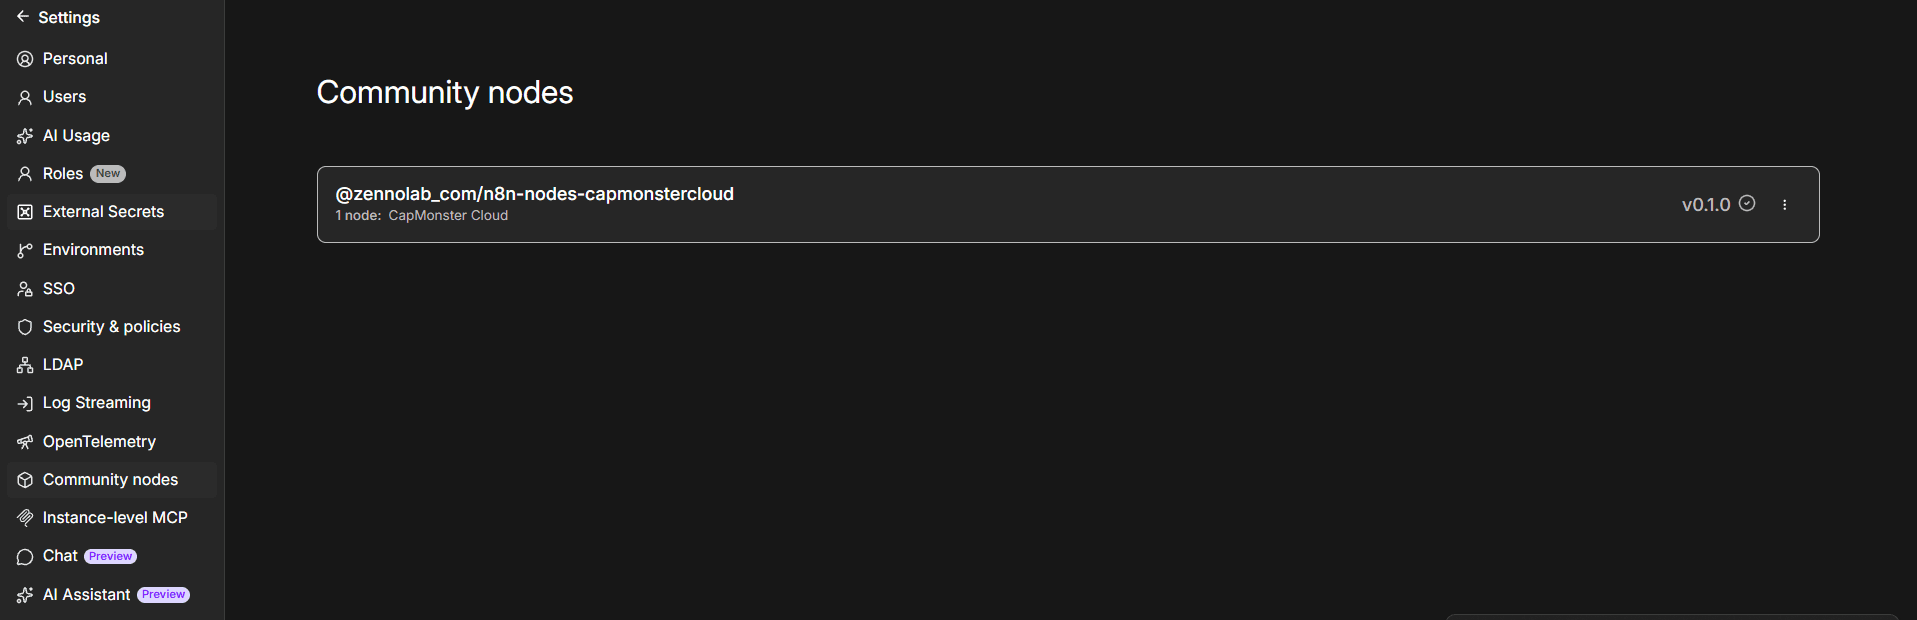
After installation, the node will be available under Community nodes.
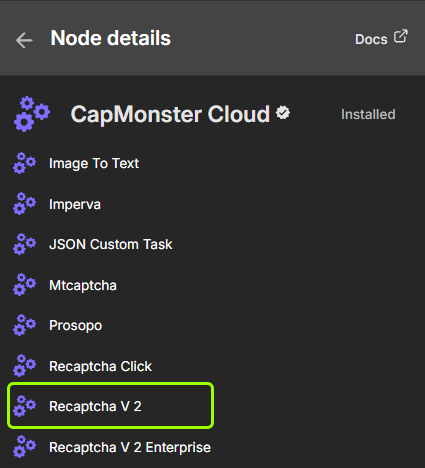
Select reCAPTCHA v2
In the Actions section, select the task for solving reCAPTCHA v2.
For reCAPTCHA, CapMonster Cloud can return the solution as a token or a sequence of clicks. In this example, we will obtain a token and submit it to the test page https://lessons.zennolab.com/captchas/recaptcha/v2_simple.php?level=high to complete the reCAPTCHA verification.
Connect Your API Key
In the credentials field, click Create new credential.
In the window that opens, paste your CapMonster Cloud API key into the API Key field and click Save.
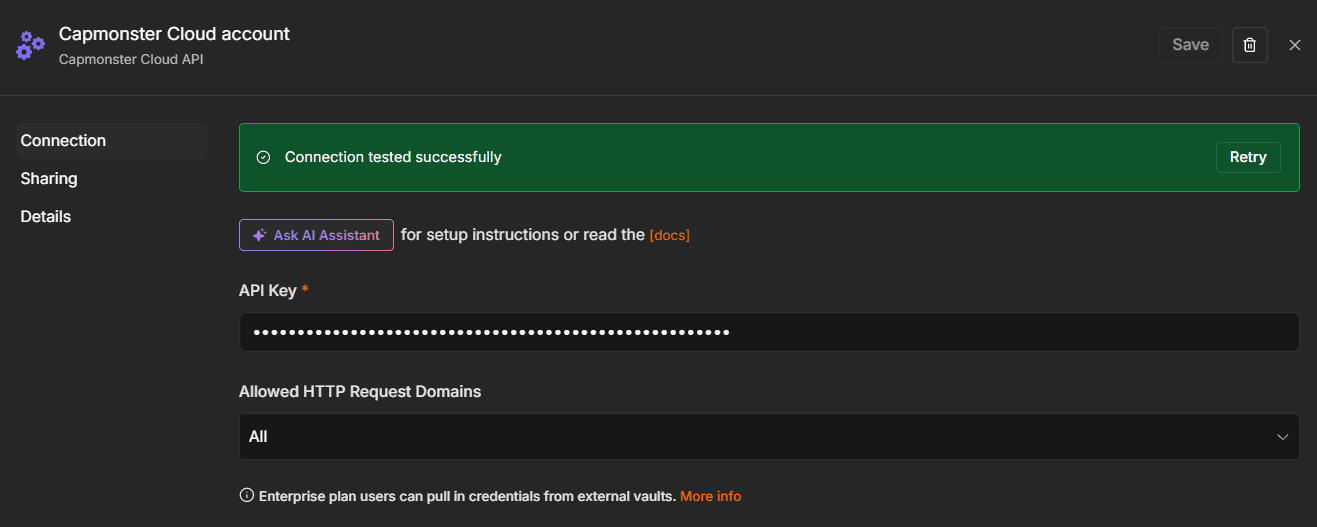
Store the API key only in the n8n credentials system. Do not add it directly to the workflow parameters or expose it in an exported JSON file.
Specify the reCAPTCHA v2 Parameters
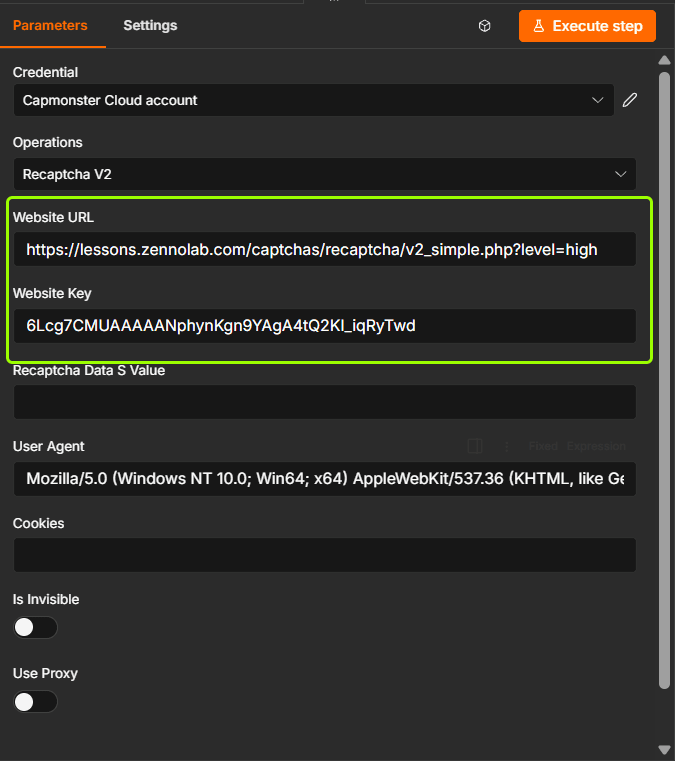
To create a reCAPTCHA v2 solving task, you typically need two main values:
Website URL – the full URL of the page where the CAPTCHA is located;
Website Key – the reCAPTCHA website key, also known as the sitekey.
Find these values using Developer Tools. For more detailed information about locating the required parameters, see the documentation:
Open the page containing the CAPTCHA and launch Developer Tools by pressing F12. Go to the Elements tab and use search (Ctrl + F) to find data-sitekey or search for sitekey.
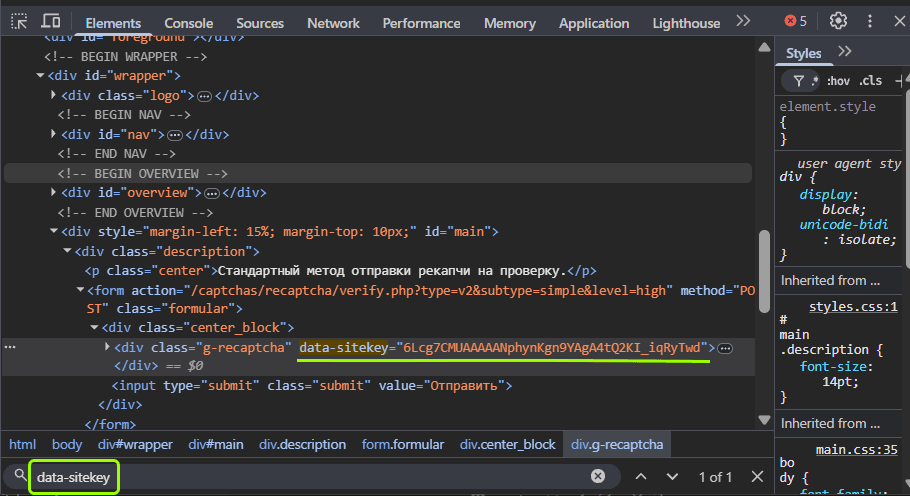
Copy the value you found into the Website Key field, and enter the page URL (https://lessons.zennolab.com/captchas/recaptcha/v2_simple.php?level=high) in the Website URL field.
The current User-Agent supported by our service is set automatically.
Execute the Action
After filling in the required parameters, click Execute step.
Execute step runs only the selected node.
Execute workflow runs the entire connected workflow.
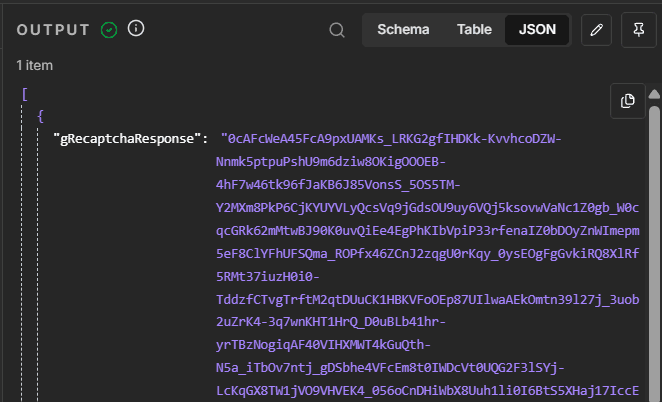
If the task is completed successfully, an object containing the solution result will appear in the OUTPUT panel. For reCAPTCHA v2, it will include a token that must be submitted to the target website.
The response structure may look like this:
Pass the Token to an HTTP Request
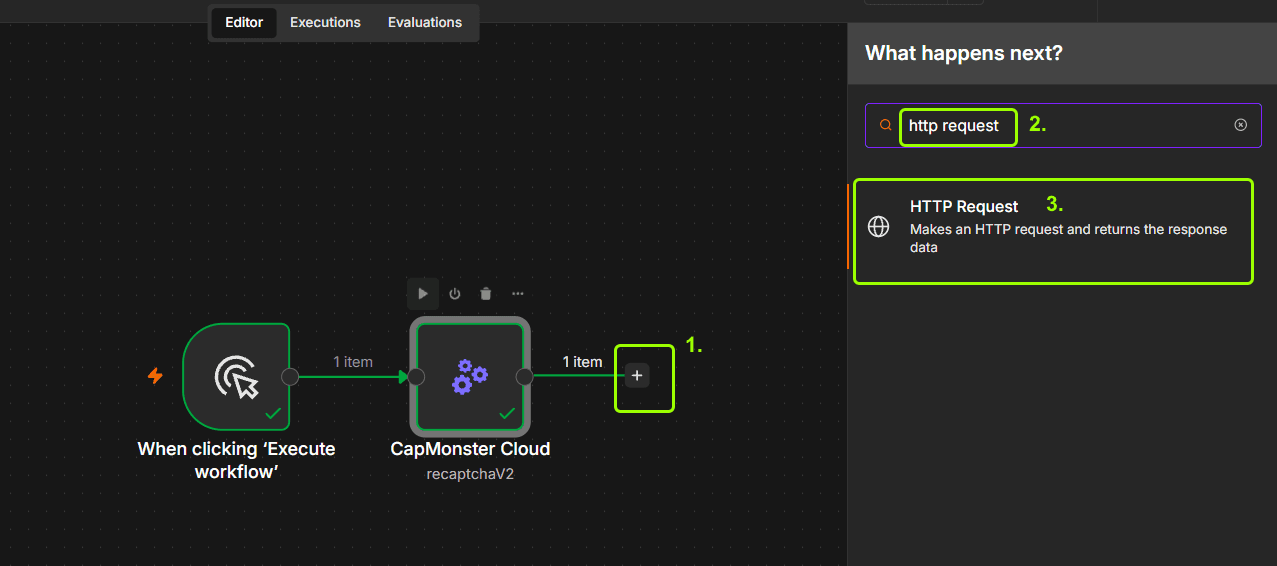
Great news – you have received the token from the service! You can now continue the workflow and use the token for verification. Add an HTTP Request node after the CapMonster Cloud node.
Use the token immediately after the CAPTCHA is solved. Do not save it for reuse or submit the same token multiple times. A new solution must be obtained for each verification attempt.
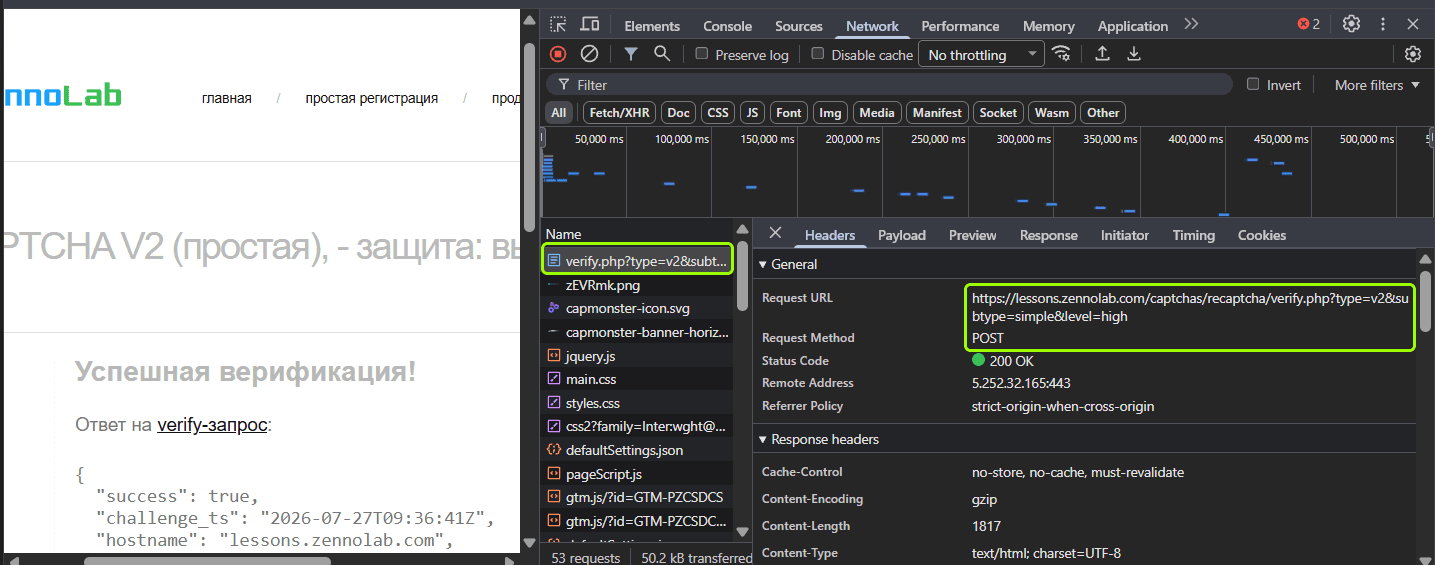
To determine the request URL and structure, solve the CAPTCHA manually and inspect the submitted request in the Network tab of Developer Tools.
After manually solving reCAPTCHA and clicking the “Submit” button, a POST request appears in the Network tab at the following URL: https://lessons.zennolab.com/captchas/recaptcha/verify.php?type=v2&subtype=simple&level=high.
This is the endpoint that accepts the CAPTCHA verification result.
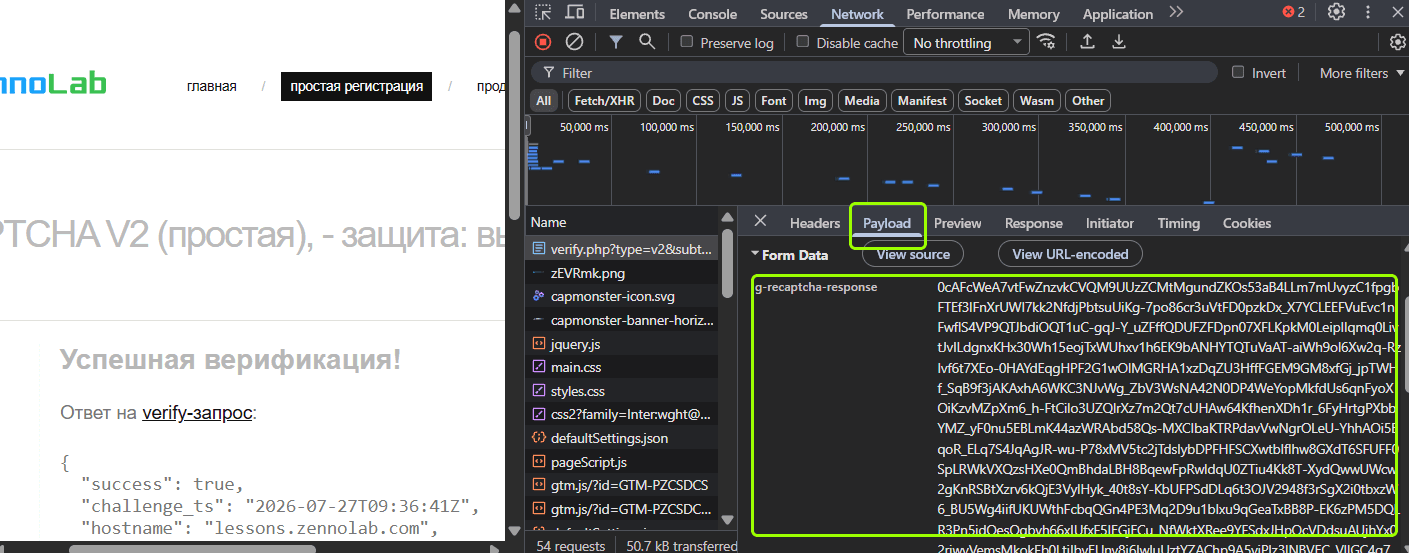
The request body contains the obtained reCAPTCHA token under the parameter name g-recaptcha-response.
Use this information to configure the HTTP Request node:
- Method – select POST;
- URL – https://lessons.zennolab.com/captchas/recaptcha/verify.php?type=v2&subtype=simple&level=high;
- Enable Send Body;
Select the body type:
Body Content Type: Form URL-Encoded
Add the following parameter:
Name: g-recaptcha-response
- In the Specify Body field, insert the value returned by the CapMonster Cloud node:
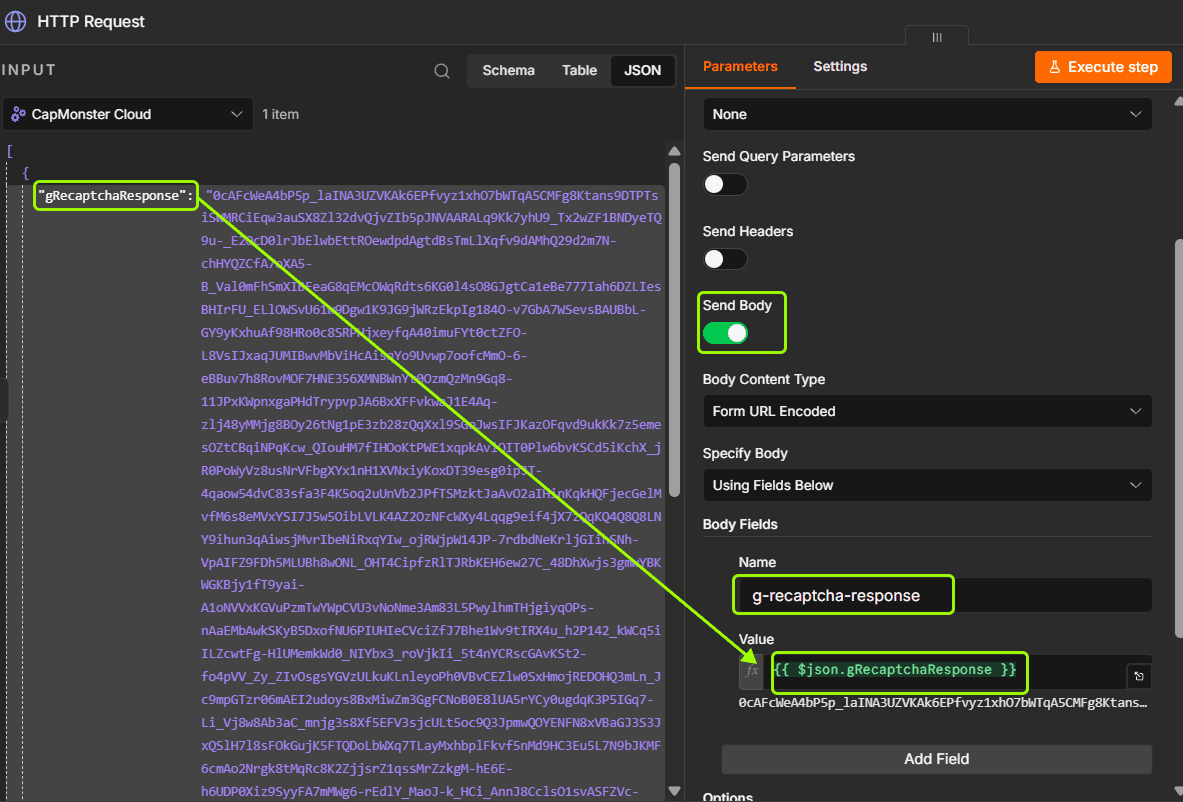
Run the Workflow and Check the Website Response
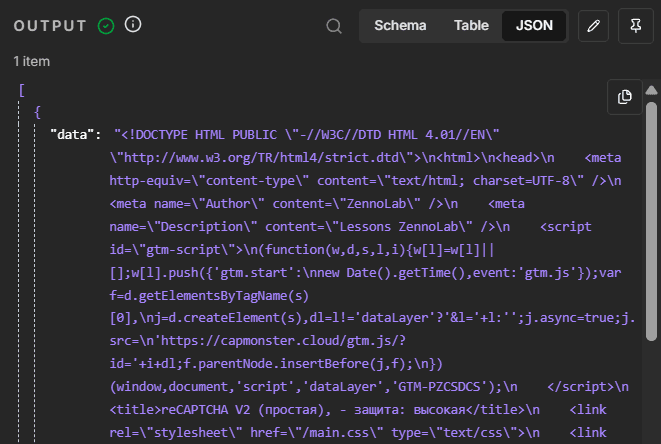
After the request is executed, the server will return an HTML page containing the verification result.
If the verification is successful, the HTML will contain "success": true.
The response will also include the result of the verification request:
{
 "success": true,
 "challenge_ts": "2026-07-24T10:08:52Z",
 "hostname": "lessons.zennolab.com"
}
Extract the Result from the HTML
The main part of the workflow is complete! For convenience, you can now process the HTML returned after submitting the token and extract only the verification result – whether the CAPTCHA was solved successfully or an error occurred.
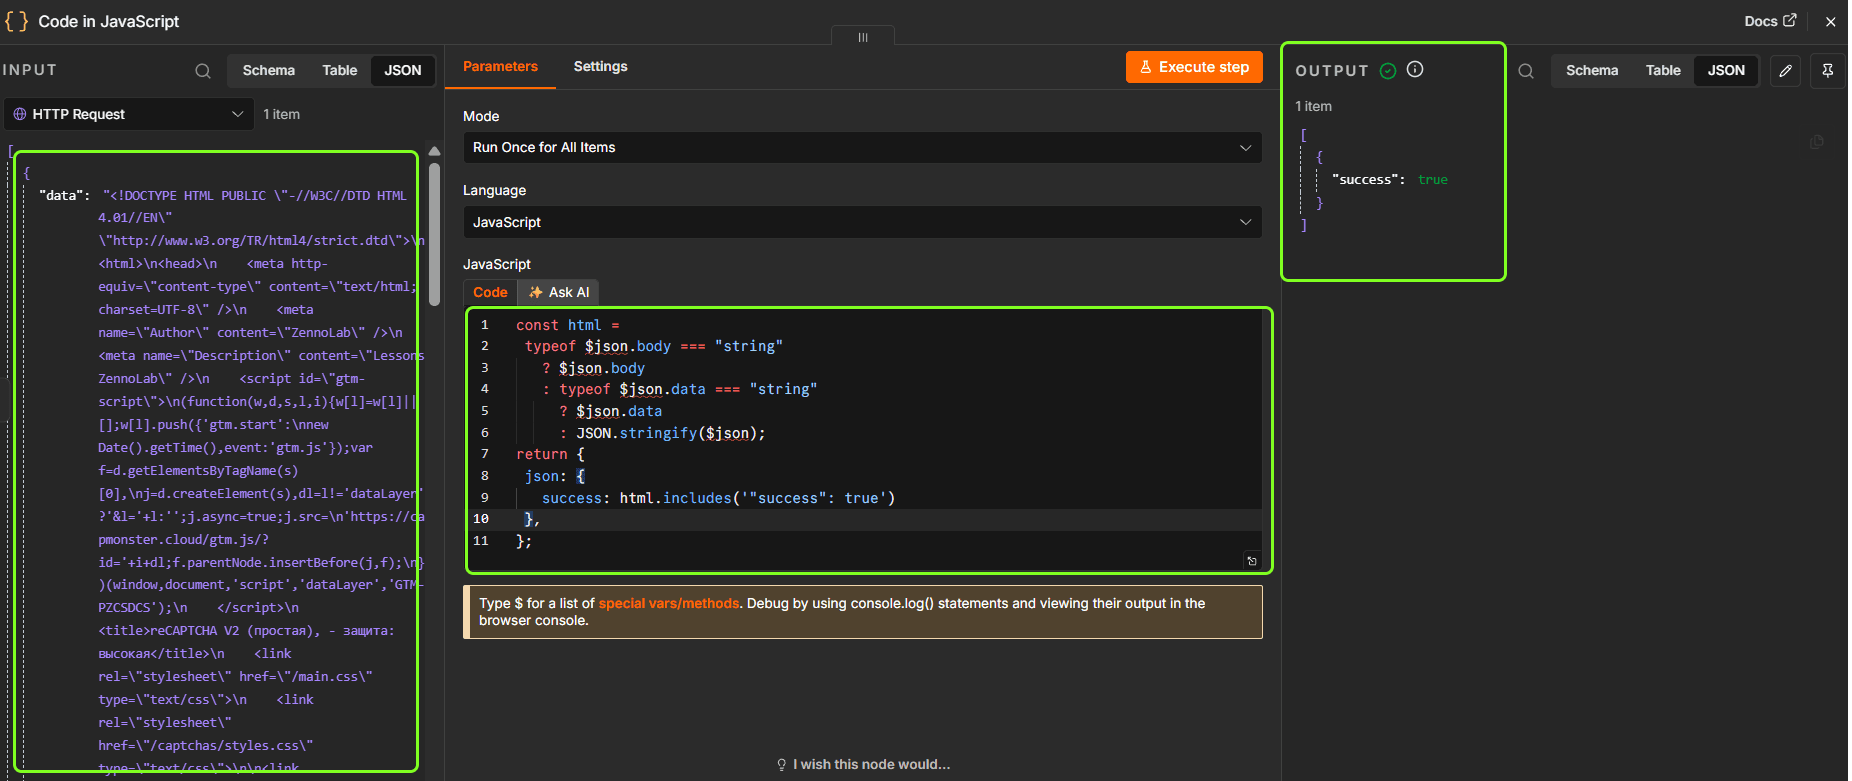
You can do this using the Code node:
- Add a Code node after the HTTP Request node and select JavaScript as the language;
Replace the default code with the following:
const html =
 typeof $json.body === "string"
   ? $json.body
   : typeof $json.data === "string"
     ? $json.data
     : JSON.stringify($json);
return {
 json: {
   success: html.includes('"success": true')
 },
};
Because the page contains the text "success": true, the code checks whether this text is present in the returned HTML:
if the text is found, the success field is set to true;
if the text is not found, the success field is set to false.
After the Code node is executed, the result will look like this:
The value used for verification depends on the response from the target website. Replace "success": true with the actual indicator of success, such as a message displayed on the page, a JSON value, the response status, the final URL, or another suitable parameter.
Possible Errors and Solutions
| Problem | What to Check |
| The node does not appear after installation | Make sure the installation completed without errors, and restart n8n. For self-hosted instances, verify that community nodes are enabled. |
| CapMonster Cloud does not return a token | Check the API key, account balance, Website URL, Website Key, and all required task parameters. |
| The website does not accept the token | Make sure the token has not expired or been reused. Check the endpoint, field name, cookies, headers, form parameters, proxy, and session data. |
A complete list of errors that may occur while solving a CAPTCHA is available in the relevant documentation section.
If you experience any difficulties solving reCAPTCHA v2 in n8n with CapMonster Cloud, contact our support team – we will help you resolve the issue.
Conclusion
The setup is now complete! You can now integrate reCAPTCHA v2 solving into an n8n workflow as a standard automation step.
The workflow obtains the CAPTCHA parameters, sends them to CapMonster Cloud, receives a ready-to-use token, and passes it to the next request to the target website or API. If necessary, you can additionally validate the response in a Code node and route the workflow to the appropriate branch.
Once the workflow is configured, you will not need to repeat this process manually. The key points are to submit the correct CAPTCHA parameters, preserve the current session data, and use the result immediately after receiving it. This saves time and lets you focus on the workflow logic itself.
Frequently Asked Questions