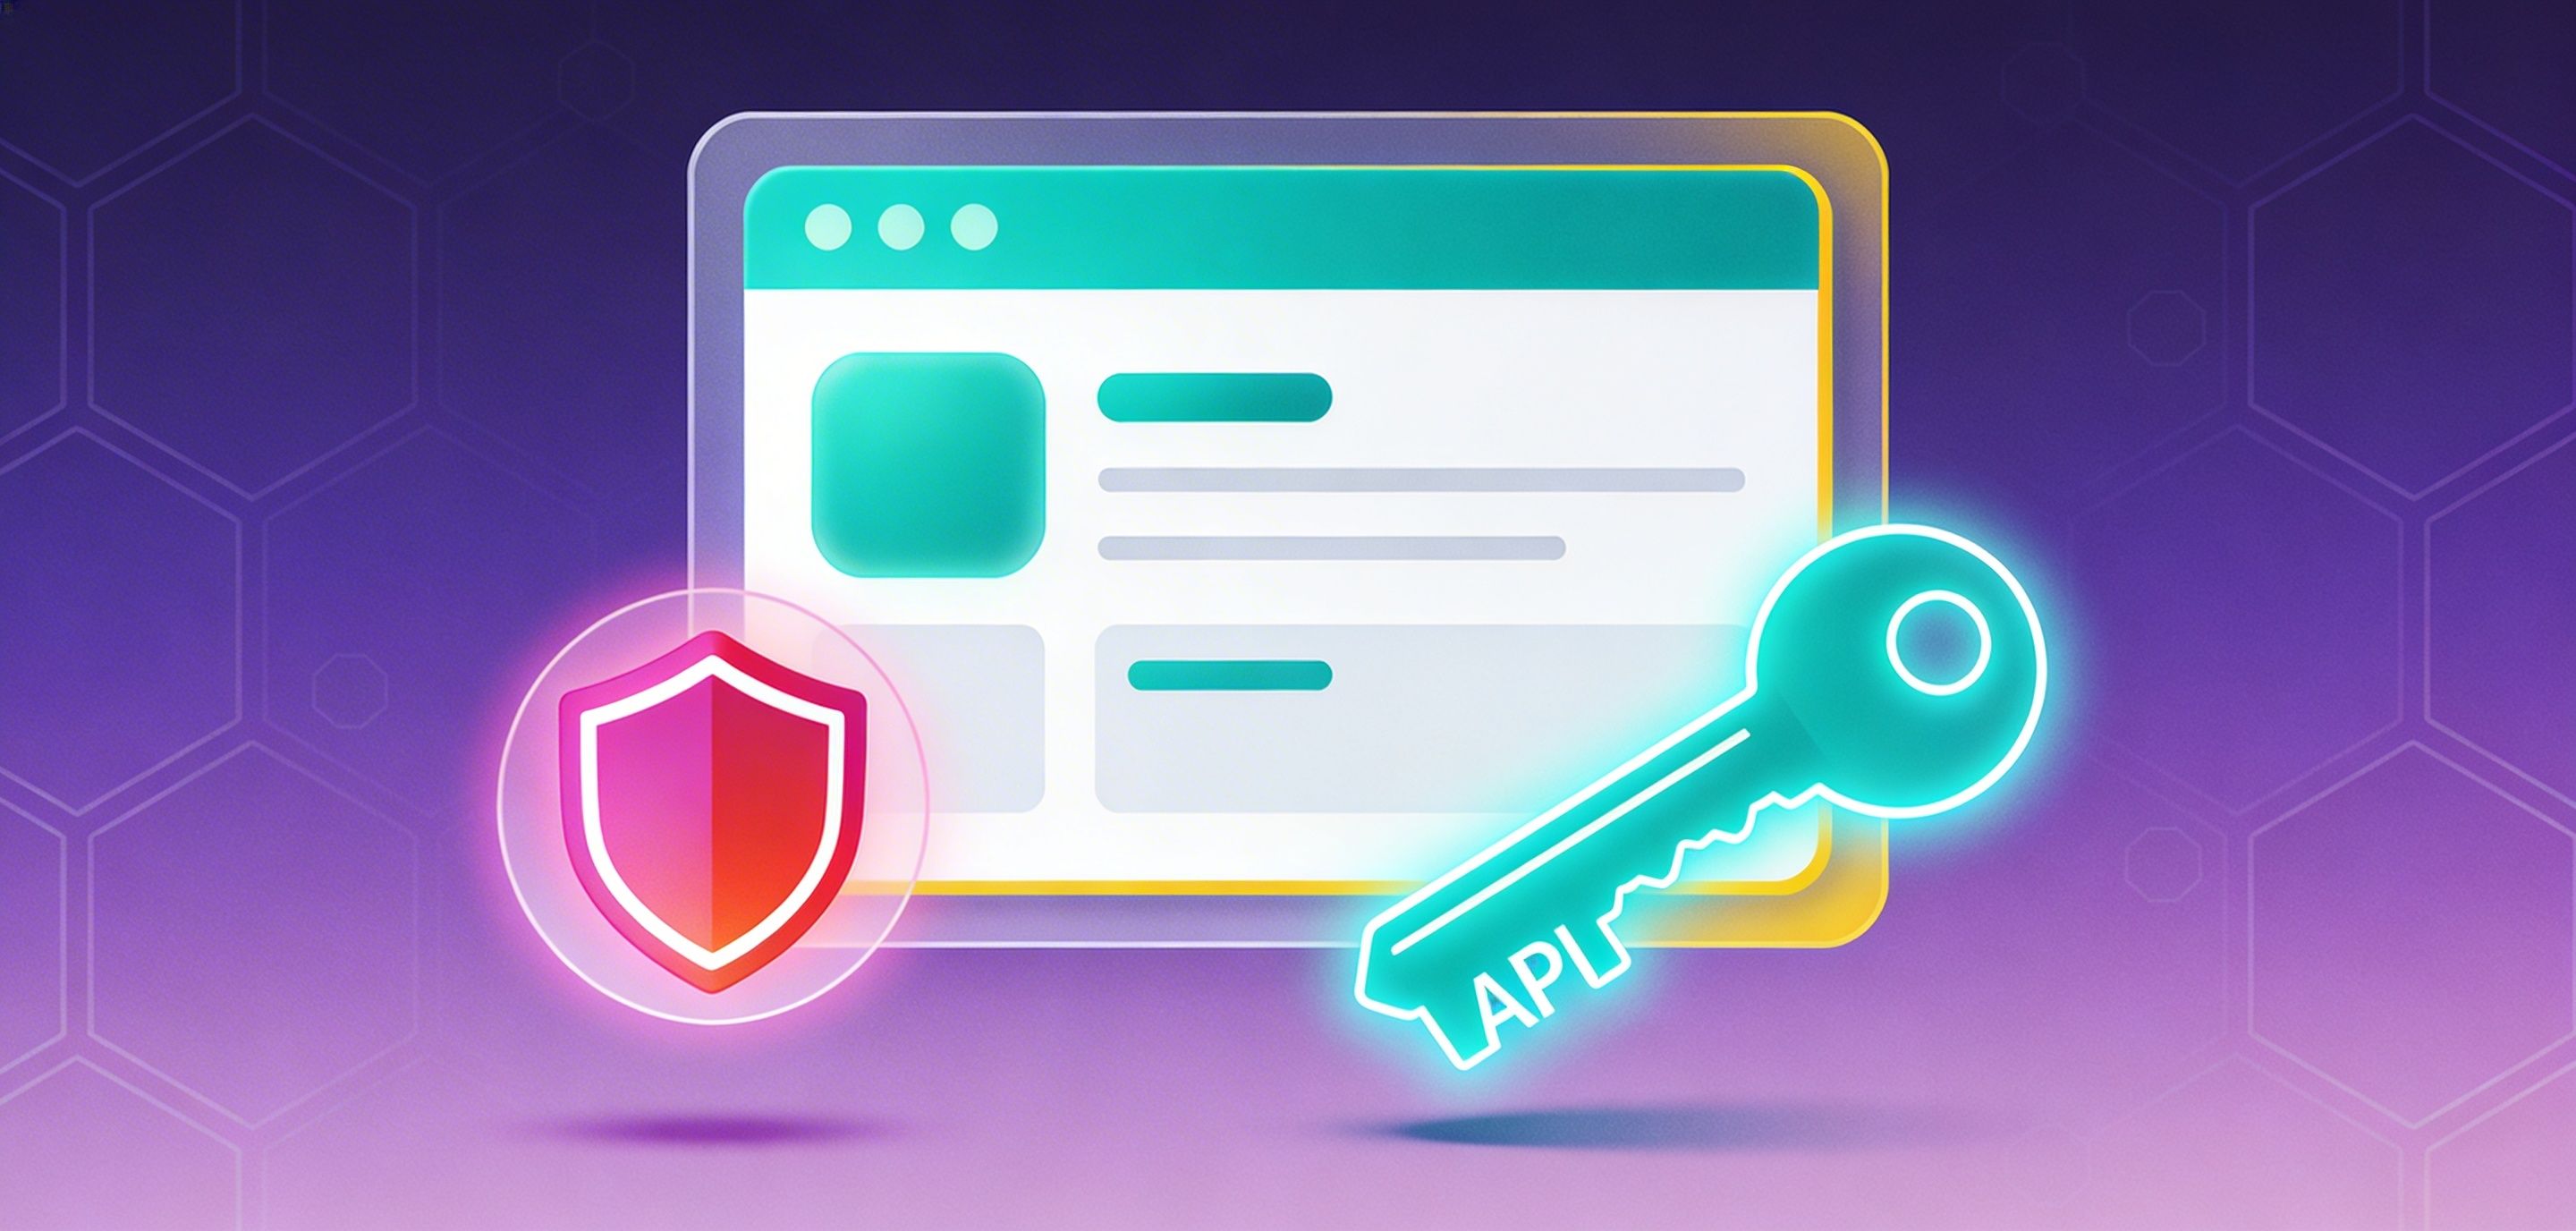
How to Find and Use Your reCAPTCHA Secret Key

If your website relies on Google reCAPTCHA to block bots, the reCAPTCHA secret key is the most security-critical credential you own. Without it, your server cannot verify whether a user actually passed the CAPTCHA challenge — making the protection effectively useless. Yet it is also the key most commonly misconfigured, leaked, or misunderstood.
This guide walks you through exactly what the secret key is, how to find it in the Google Admin Console, how to integrate it correctly in your backend code, and how to keep it safe. We'll also cover how tools like CapMonster Cloud use the complementary public key for legitimate automated testing of your own CAPTCHA setup.
What Is a reCAPTCHA Secret Key?
Google reCAPTCHA issues two keys when you register a site — and understanding the difference is essential before touching a single line of code.
The recaptcha secret key (sometimes called the recaptcha_secret_key in code) is used exclusively on your server. It is sent in a POST request to Google's siteverify endpoint alongside the token the user's browser generated. Google responds with a JSON object confirming whether the challenge was passed.
Both reCAPTCHA v2 (the classic checkbox and invisible variants) and reCAPTCHA v3 (score-based, no user interaction) follow this same two-key model. The difference lies in what the token represents: a binary pass/fail for v2, or a risk score between 0.0 and 1.0 for v3.
How to Find Your reCAPTCHA Key in the reCAPTCHA Admin Console
If you are obtaining a Google reCAPTCHA key pair for the first time, you can do so through the reCAPTCHA Admin Console — the process is described in this section. If you have already registered reCAPTCHA keys for your websites, note that existing keys are managed in the Google Cloud Console; you can skip ahead to the next section.
Step 1 — Go to the reCAPTCHA Admin Console
Navigate to google.com/recaptcha/admin. Sign in with the Google account you want to own the keys.
Step 2 — Register a new site
After signing in, you will see a prompt to register a first site:
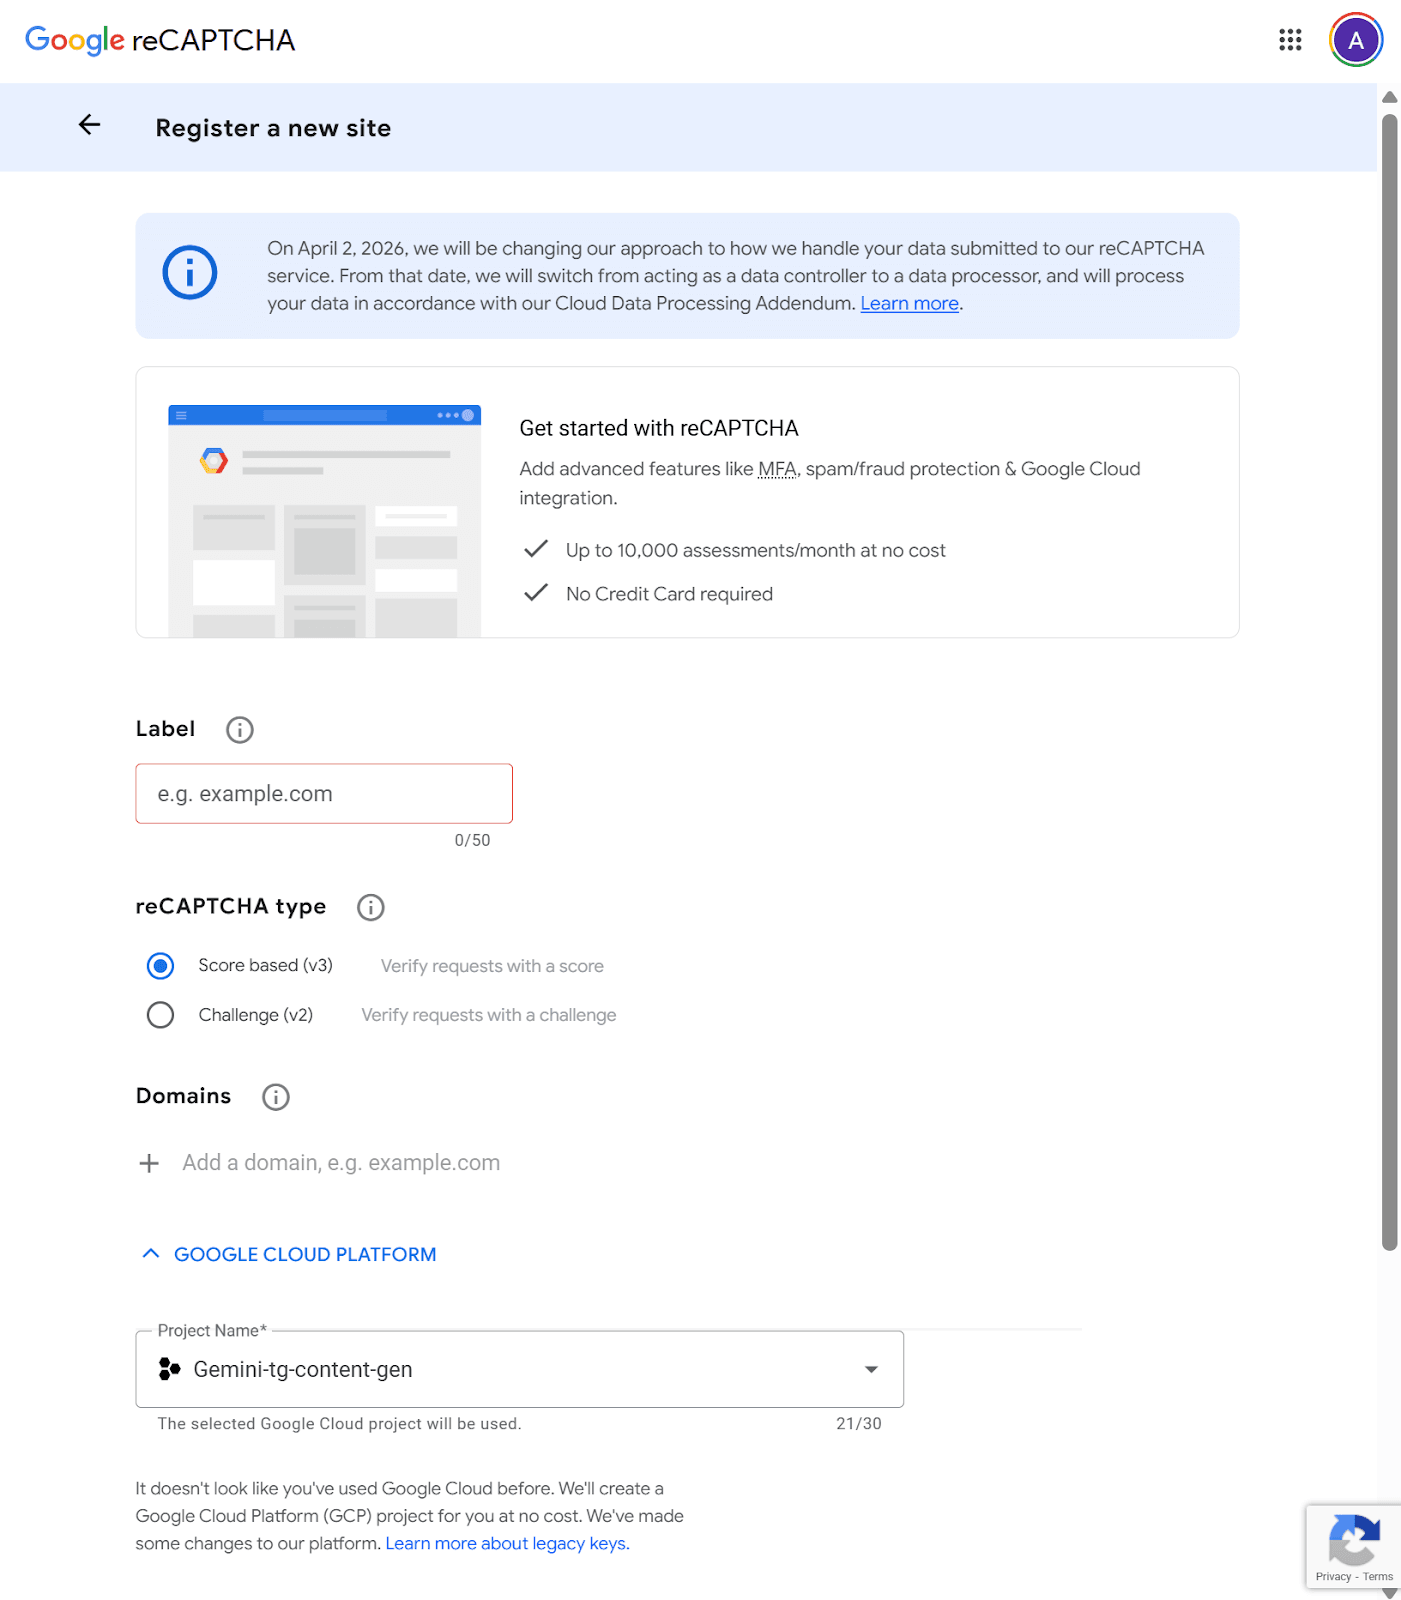
Fill in:
- Label: A display name used solely for your own identification within the console. Use something descriptive like Production – Checkout Form or Staging – Contact Page. There are no SEO or security implications; it is purely for internal clarity, especially when managing multiple keys.
- reCAPTCHA type: see the table below.
- Domains: Restricts which domains are allowed to load and submit reCAPTCHA tokens using this key. A registration for example.com automatically covers subdomain.example.com — no need to list subdomains separately. Rules to note:
- Do not include a path, port, query string, or fragment (e.g., use example.com, not example.com/contact).
- Domain changes can take up to 30 minutes to propagate.
- This field does not apply to the reCAPTCHA v2 Android site type.
Keeping this list tight is one of the most effective ways to prevent unauthorized use of your key on third-party domains.
- Google Cloud Platform: Created API keys are managed in the Google Cloud Platform. So, if you don't have a Google Cloud Platform account or project, you will be prompted to create one automatically.
Step 3 — Choose your reCAPTCHA type
Note that you cannot change it after registration:
When using the google recaptcha v2 path, you get a challenge-based widget with tunable security. When using the recaptcha v3 path, the protection is invisible and score-based — your server decides what to do with the result.
Step 4 — Accept the Terms and Submit
Check the Terms of Service box and click Submit. Google will generate your key pair.
Step 5 — Copy your keys
On the confirmation screen you will see two values:
- Site key — safe to make public; goes into your HTML
- Secret key — your google reCAPTCHA secret key; goes to your server only
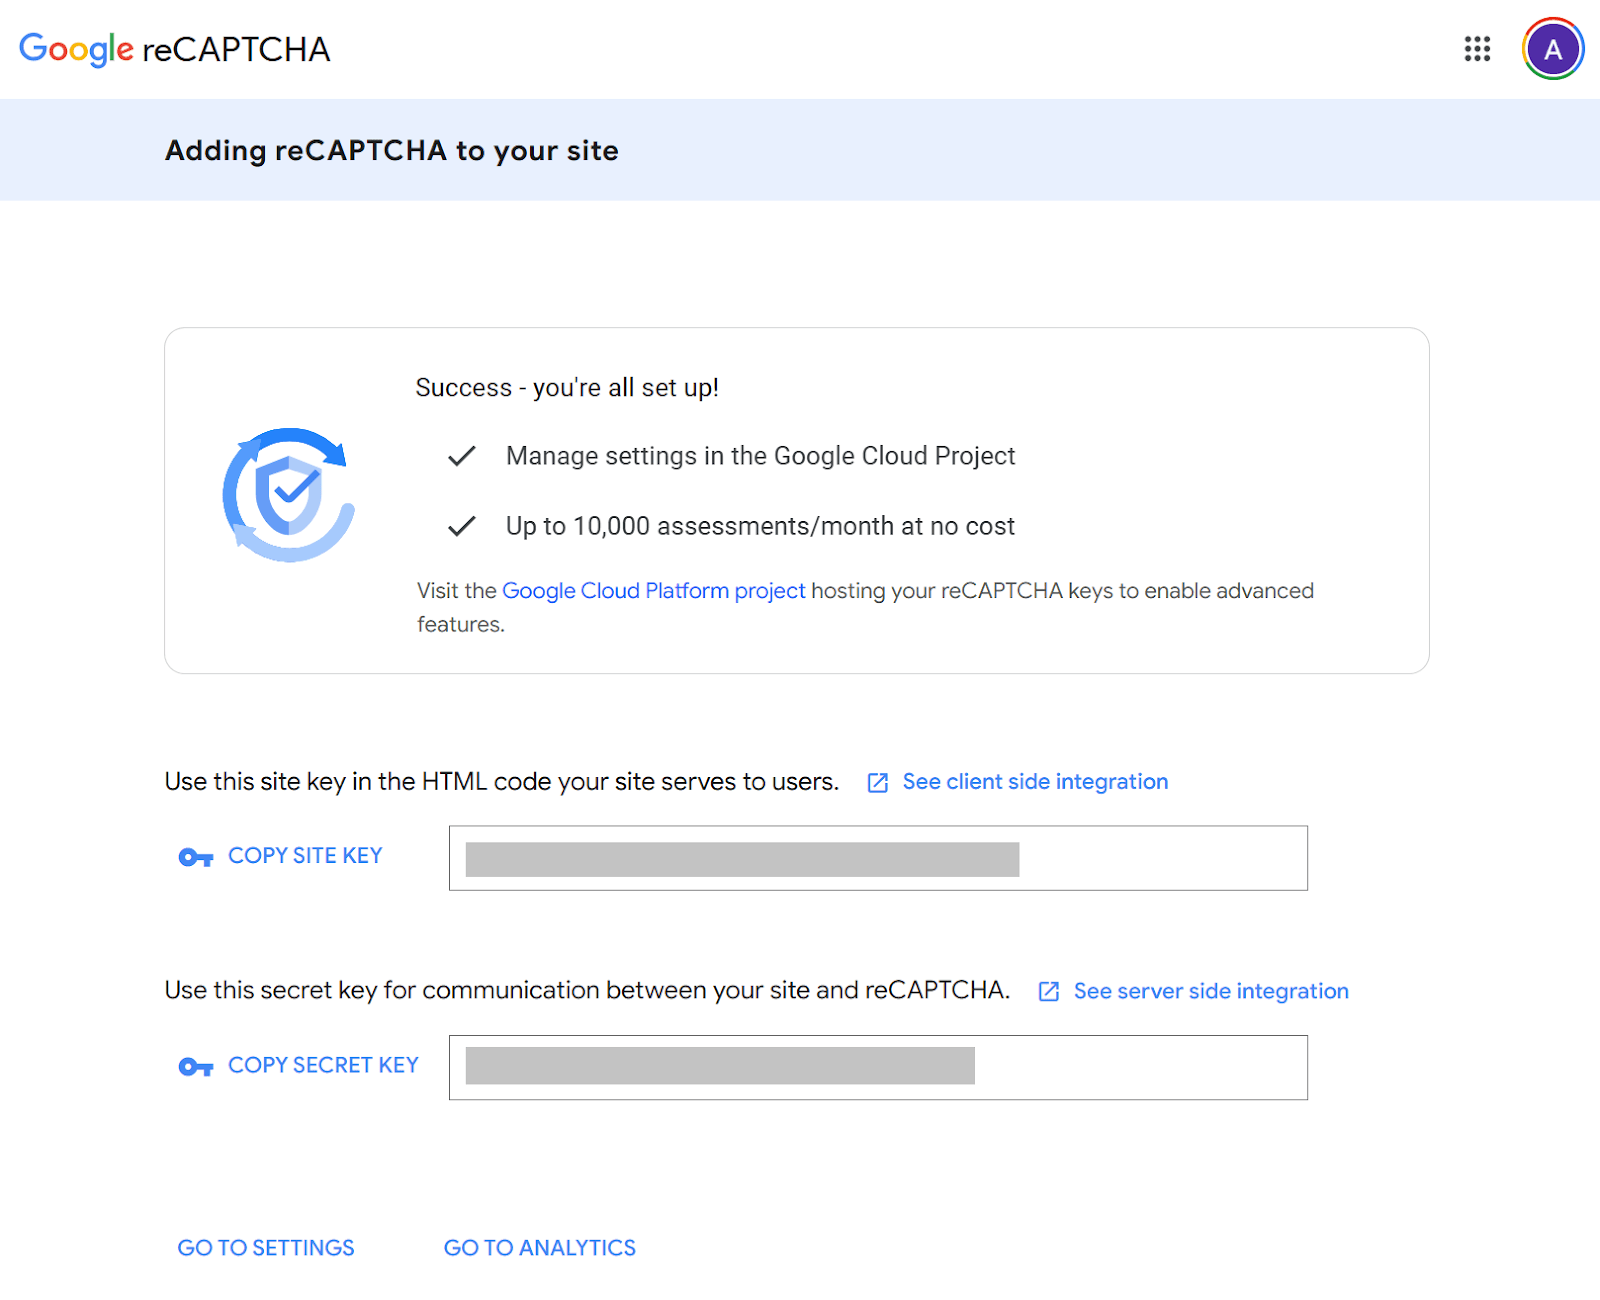
Copy both to a secure password manager or secrets vault immediately. Then you can see these keys by visiting the Google Cloud Console (see below).
How to Find Your reCAPTCHA Key in the Google Cloud Console
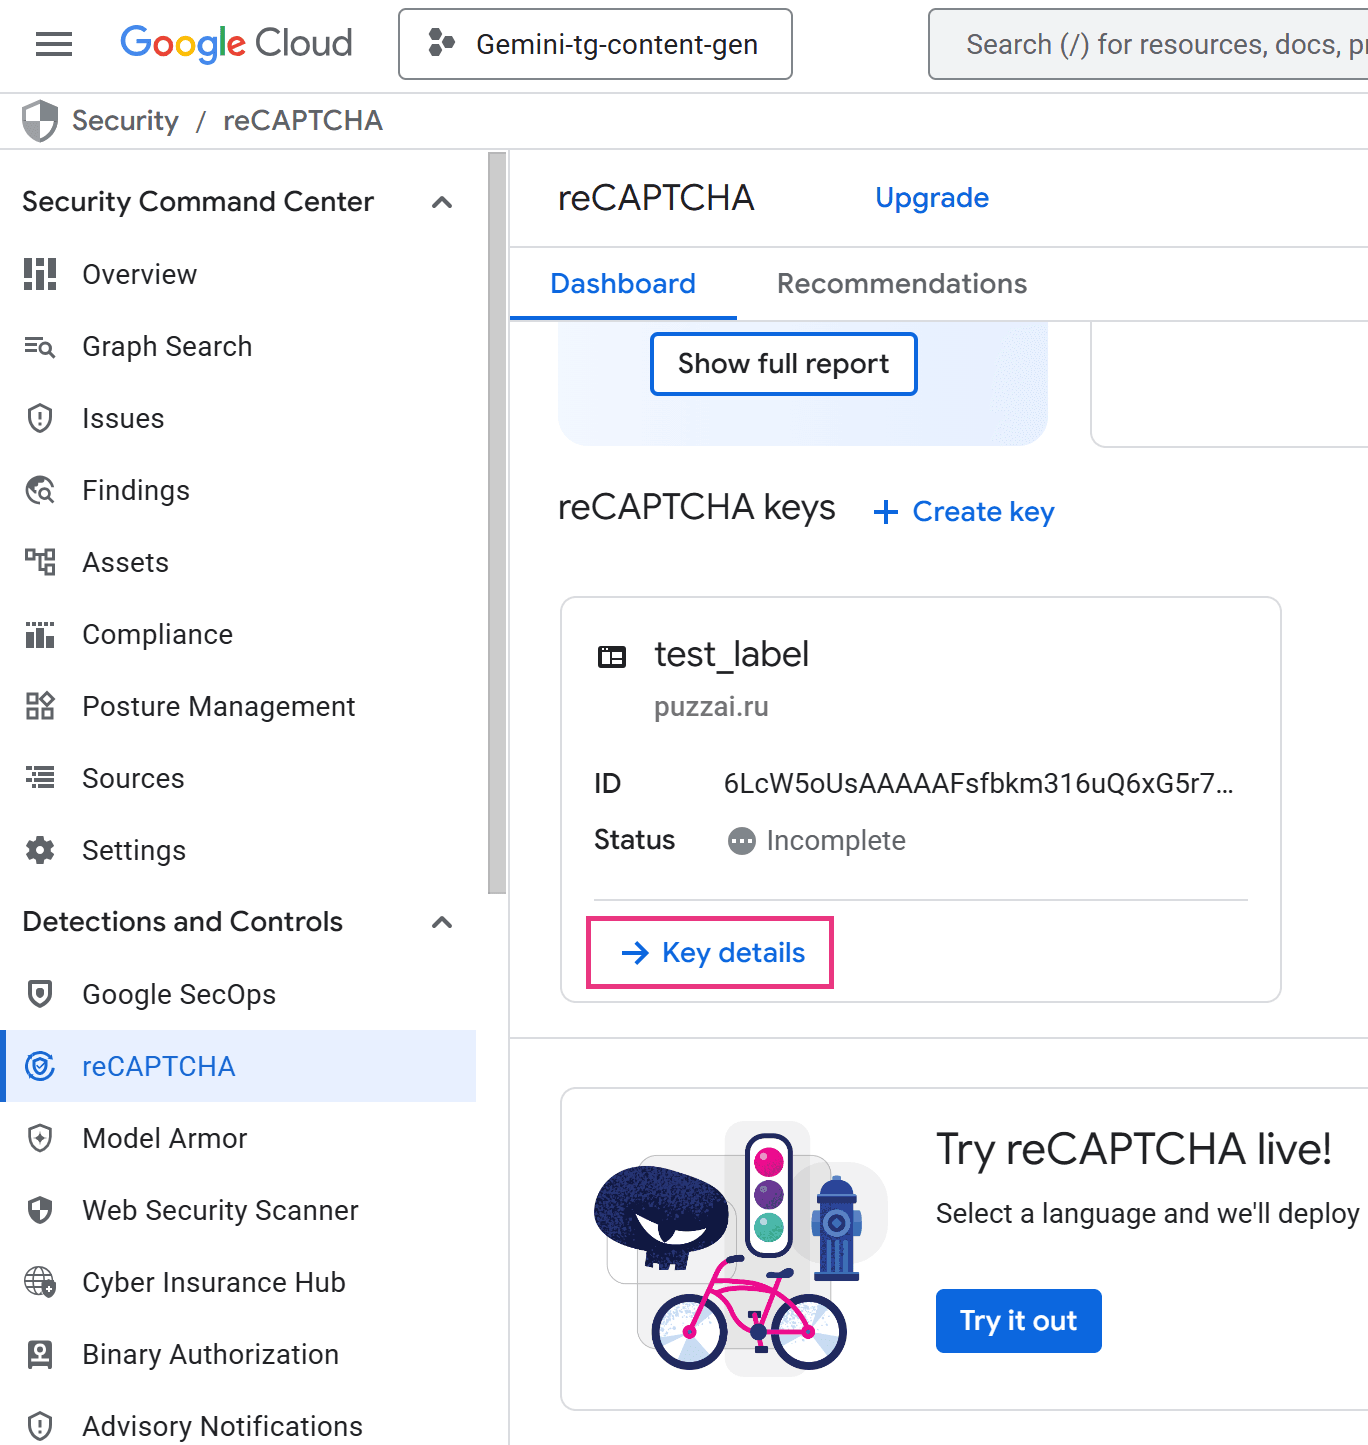
Currently reCAPTCHA Admin Console allows you to register only your first website. Subsequent key management and registration of new ones is carried out in the Google Cloud Console.
Step 1 — Go to the Google Cloud Console
To view your keys for an existing site, open the Google Cloud Console > Security > Detections and Controls > reCAPTCHA > Dashboard tab and scroll a bit down to the reCAPTCHA keys section:
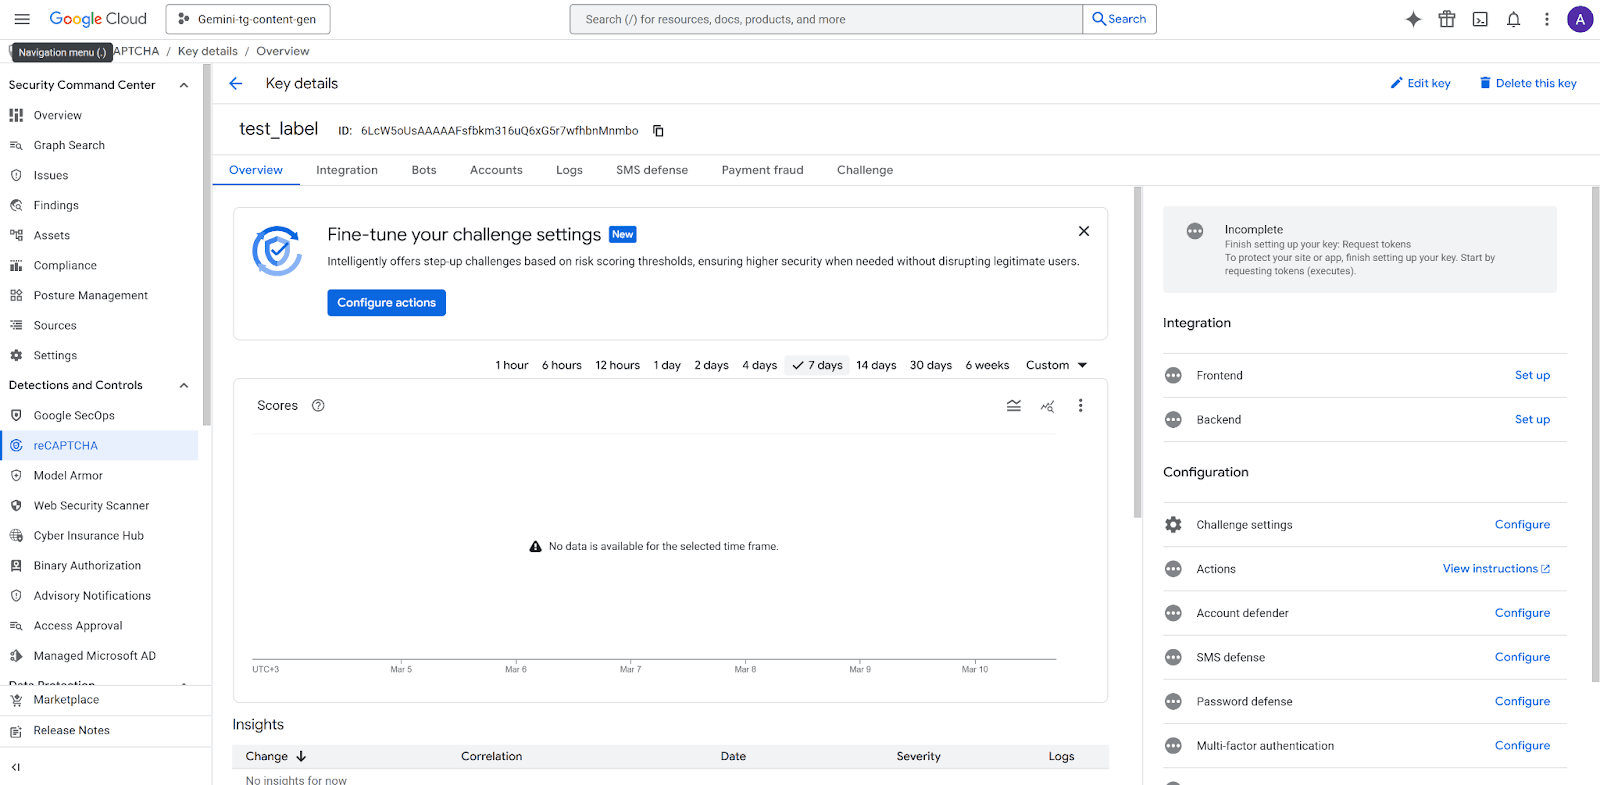
Step 2 — Open the Key details panel
Click Key details and you will be navigated to the Key details panel:
Step 3 — Copy your keys
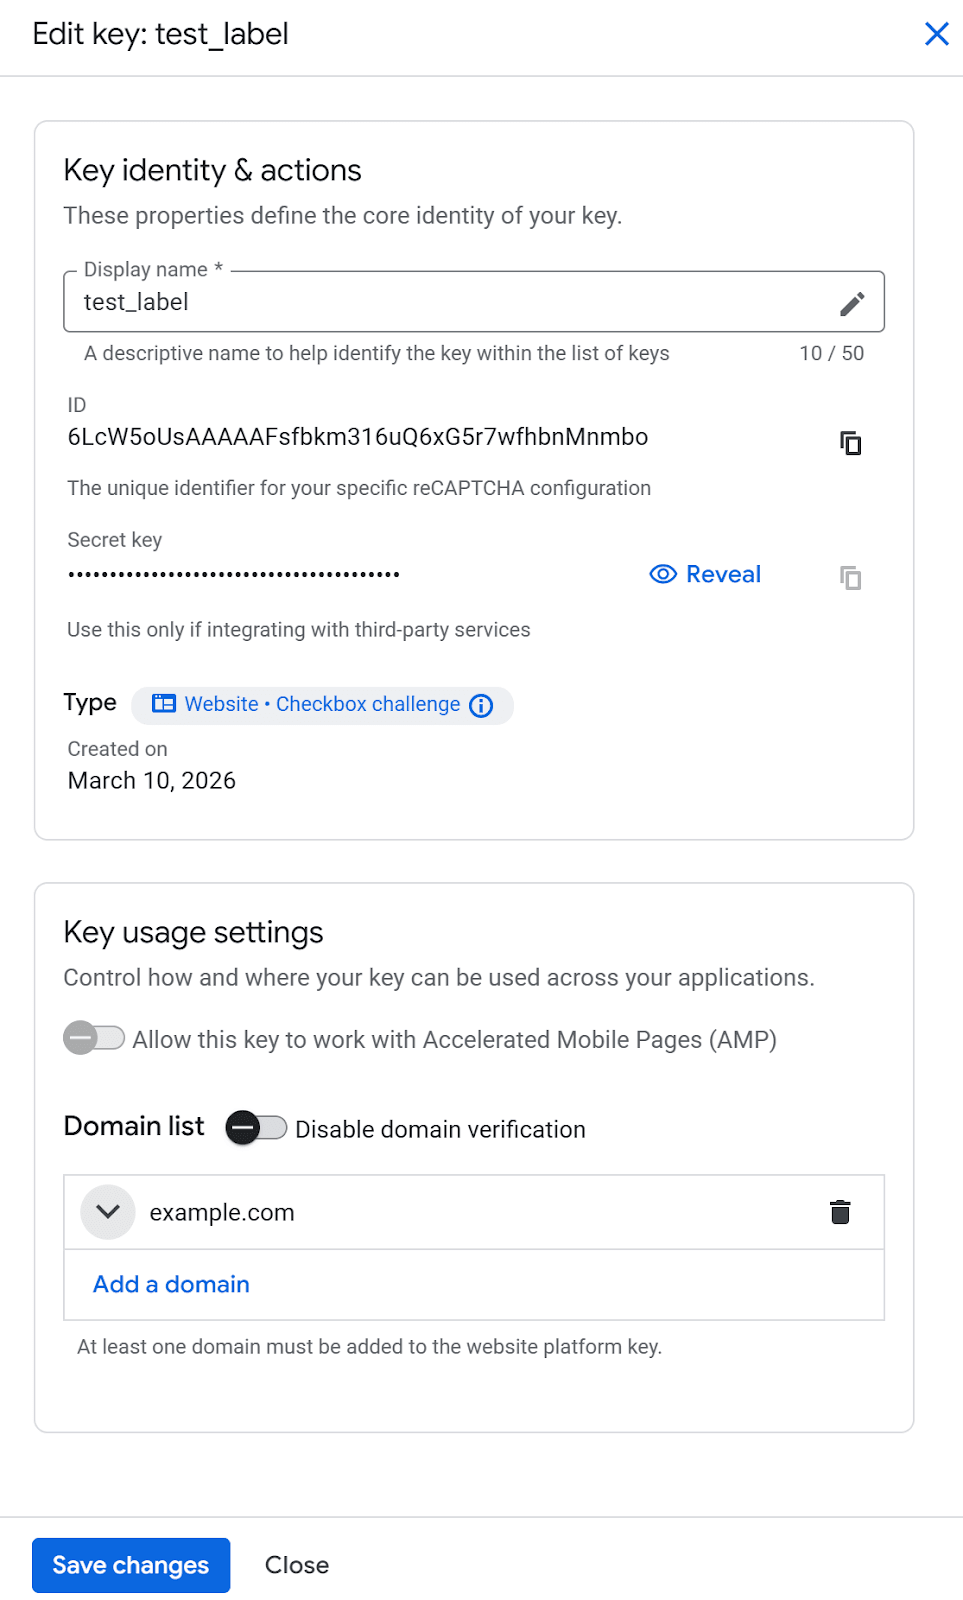
From the Key details page (recaptcha admin panel), click Edit key:
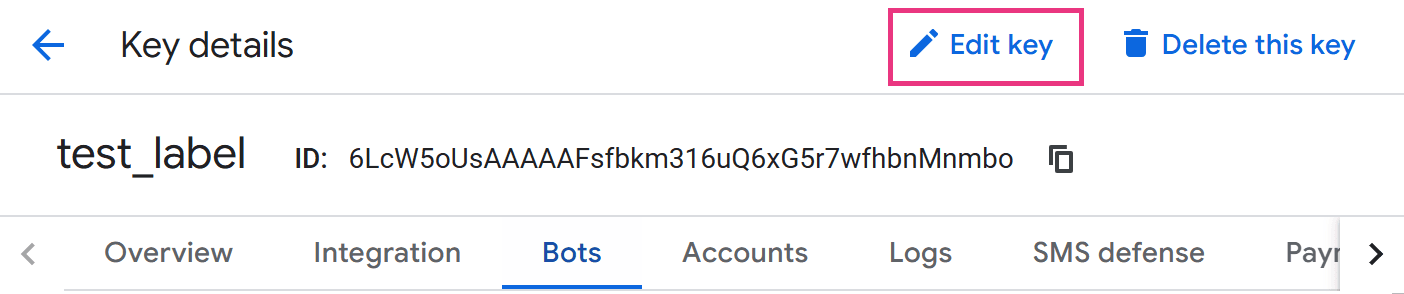
The settings menu will be opened and you’ll see both your site key (ID) and secret key:
How to Use reCAPTCHA Keys in Your Code
The verification flow has two distinct parts: the frontend that shows the widget, and the backend that validates the response.
Frontend: Embedding the Site Key
Place the following snippet in any HTML page where you want the widget to appear. The data-sitekey attribute takes your recaptcha public key — never the secret.
reCAPTCHA v2 Checkbox widget:
<html>
  <head>
    <script src="https://www.google.com/recaptcha/api.js" async defer></script>
  </head>
  <body>
    <form action="/submit" method="POST">
      <div class="g-recaptcha" data-sitekey="YOUR_SITE_KEY"></div>
      <button type="submit">Submit</button>
    </form>
  </body>
</html>
When the user submits the form, Google's script injects a hidden field g-recaptcha-response containing a short-lived token. That token is what your server must validate.
Backend: Verifying the Token with the Secret Key
Your server sends the token and the recaptcha_secret_key to Google's verification endpoint:
POST https://www.google.com/recaptcha/api/siteverify
Node.js (using axios):
const axios = require('axios');
async function verifyRecaptcha(token) {
  const secret = process.env.RECAPTCHA_SECRET_KEY; // loaded from env
  const { data } = await axios.post(
    `https://www.google.com/recaptcha/api/siteverify`,
    new URLSearchParams({ secret, response: token })
  );
  return data.success; // true if human, false if bot
}
PHP:
$token  = $_POST['g-recaptcha-response'] ?? '';
$secret = getenv('RECAPTCHA_SECRET_KEY');
$options = [
  'http' => [
    'header'  => "Content-type: application/x-www-form-urlencoded\r\n",
    'method'  => 'POST',
    'content' => http_build_query(['secret' => $secret, 'response' => $token])
  ]
];

$context  = stream_context_create($options);
$response = file_get_contents('https://www.google.com/recaptcha/api/siteverify', false, $context);
$result = json_decode($response, true);
if (!empty($result['success'])) {
  // Proceed with form processing
} else {
  // Reject the request
}
Python (using requests):
import requests, os
def verify_recaptcha(token: str) -> bool:
    secret = os.environ["RECAPTCHA_SECRET_KEY"]
    r = requests.post(
        "https://www.google.com/recaptcha/api/siteverify",
        data={"secret": secret, "response": token}
    )
    return r.json().get("success", False)
Google's API returns a JSON object. For reCAPTCHA v2, check the success field. For v3, also check the score field (values closer to 1.0 indicate human behavior) and the action field to confirm the token was generated on the expected page.
Security Best Practices for Your reCAPTCHA Keys
Protecting your google reCAPTCHA private key is not optional — a leaked secret key lets attackers forge verification results and bypass your bot protection entirely.
1. Never expose the secret key on the client side. The recaptcha private key must never appear in HTML, JavaScript, mobile app binaries, or public Git repositories. Even a brief exposure in a commit history is enough to compromise your site — always treat it with the same sensitivity as a database password.
2. Store keys in environment variables or a secrets manager. Hardcoding the recaptcha_secret_key in source files is one of the most common security mistakes. Instead, load it at runtime:
- Local development: .env file loaded via dotenv(never committed to version control)
- Production: platform secrets (e.g., AWS Secrets Manager, Google Secret Manager, HashiCorp Vault, or your hosting provider's environment variable UI)
3. Restrict allowed domains. In the Admin Console, always specify the exact domains authorized to use your recaptcha key. This prevents other websites from rendering your widget and consuming your quota — or potentially probing your verification logic.
4. Validate every field in the API response. A secure server-side check should confirm:
- success is true
- hostname matches your actual domain
- For v3: score is above your threshold (typically 0.5) and action matches the expected action name
- The token has not already been used (tokens are single-use; replay attempts return success: false)
5. Rotate keys if compromised. If you suspect your google recaptcha private key has been leaked, go immediately to the Admin Console, delete the affected key pair, and register a new one. Update all deployment environments before the old key stops working.
6. Keep monitoring active. The Google Cloud Console provides traffic analytics. Regularly review requests per domain, failed verification rates, and unusual spikes — these can indicate a key leak or an active abuse attempt.
Automated reCAPTCHA Testing with CapMonster Cloud
Once your reCAPTCHA integration is live, you need to confirm it works end-to-end — including the token flow, server-side validation, and form behavior after a successful challenge. Manually solving CAPTCHAs during QA is slow and inconsistent. This is where CapMonster Cloud becomes a practical tool.
CapMonster Cloud is an automated CAPTCHA-solving service designed for testing your own websites and systems to which you have legal access. Critically, it works with your recaptcha public key (the site key) — not the secret — meaning your recaptcha_secret_key never leaves your server, even during automated test runs.
How It Works
CapMonster Cloud accepts a task via its API, solves the CAPTCHA on its servers, and returns a ready-to-use g-recaptcha-response token that you inject into your form for end-to-end validation.
Example of solving reCAPTCHA v3 using CapMonster Cloud:
Create task:
POST https://api.capmonster.cloud/createTaskRequest
{
  "clientKey": "API_KEY",
  "task": {
    "type": "RecaptchaV3TaskProxyless",
    "websiteURL": "https://lessons.zennolab.com/captchas/recaptcha/v3.php?level=beta",
    "websiteKey": "6Le0xVgUAAAAAIt20XEB4rVhYOODgTl00d8juDob",
    "isEnterprise": false,
    "minScore": 0.7,
    "pageAction": "myverify"
  }
}
Response
{
  "errorId":0,
  "taskId":407533072
}
Get task result:
POST https://api.capmonster.cloud/getTaskResultRequest
{
  "clientKey":"API_KEY",
  "taskId": 407533072
}
Response
{
  "errorId":0,
  "status":"ready",
  "solution": {
"gRecaptchaResponse":"3AHJ_VuvYIBNBW5yyv0zRYJ75VkOKvhKj9_xGBJKnQimF72rfoq3Iy-DyGHMwLAo6a3"
  }
}
The returned token is then submitted to your server exactly as a real user's token would be, letting you verify the complete validation pipeline — including your recaptcha_secret_key logic — in an automated, repeatable test. CapMonster Cloud supports reCAPTCHA v2 (checkbox and invisible), reCAPTCHA v3, and a wide range of other CAPTCHA types, making it suitable for comprehensive regression testing of your site's bot-protection layer.
Detailed API documentation and integration examples are available at capmonster.cloud.
Conclusion
Your reCAPTCHA secret key is the backbone of server-side bot verification — finding it correctly, integrating it securely, and protecting it from exposure are non-negotiable steps for any production deployment. Register your site in the reCAPTCHA Admin Console or Google Cloud Console, keep the secret exclusively on the server side stored in environment variables, and validate every field Google returns — not just the successboolean.
For teams that need to automate QA on their CAPTCHA flows, CapMonster Cloud provides a clean, API-driven way to test the full token lifecycle without ever exposing your private key. Get started with CapMonster Cloud today and eliminate manual CAPTCHA solving from your testing pipeline for good.