Frontend
2. Now create a JavaScript file script.js, which will handle the slider functionality, dragging, and server-side verification. Create a variable called captchaSession that will store the ID of the current CAPTCHA session received from the server, so it can later be used for server-side validation:
let captchaSession = "";
3. Loading the CAPTCHA session from the server:
function fetchCaptchaSession() {
  fetch("http://localhost:3000/generate-slider-captcha")
    .then((response) => response.json())
    .then((data) => {
      captchaSession = data.sessionId;
    })
    .catch((error) => console.error("Ошибка загрузки капчи:", error));
}
Here we:
- Send a fetch request to http://localhost:3000/generate-slider-captcha.
- Expect a JSON response from the server containing a sessionId field.
- Save this sessionId into the captchaSession variable.
- If an error occurs, it is logged to the console.
- This is needed so the sessionId can later be sent to the verify-slider endpoint for validation.
4. Next, get access to the required HTML elements:
const slider = document.getElementById("slider");
const button = document.getElementById("sliderButton");
const successMessage = document.getElementById("successMessage");
const errorMessage = document.getElementById("errorMessage");
let isDragging = false;
let sliderCompleted = false;
isDragging – tracks whether drag mode is currently active.
sliderCompleted – prevents repeated actions if the CAPTCHA has already been completed.
5. Handle mouse press on the slider:
button.addEventListener("mousedown", () => {
 if (sliderCompleted) return;
 isDragging = true;
});
When the mouse button is pressed on the slider, the script checks whether the CAPTCHA has already been completed. If not, drag mode is enabled (isDragging = true).
6. Moving the slider:
document.addEventListener("mousemove", (e) => {
  if (!isDragging) return;
  let rect = slider.getBoundingClientRect();
  let offsetX = e.clientX - rect.left;
  if (offsetX < 0) offsetX = 0;
  if (offsetX > rect.width - button.offsetWidth)
    offsetX = rect.width - button.offsetWidth;
  button.style.left = offsetX + "px";
});
Whenever the mouse moves, we check whether drag mode is enabled, calculate the mouse position relative to the slider, and limit the value to the slider boundaries. Then we update the button's left property so that the slider moves accordingly.
7. Finish the action by releasing the mouse button:
document.addEventListener("mouseup", () => {
  if (!isDragging) return;
  isDragging = false;
  let rect = slider.getBoundingClientRect();
  let finalPosition = parseInt(button.style.left);
We check whether dragging was in progress, disable isDragging, and get the slider's final position. Then we check whether the slider has reached the end:
if (finalPosition >= rect.width - button.offsetWidth - 5) {
8. Send the result to the server (successful completion):
   fetch("http://localhost:3000/verify-slider", {
     method: "POST",
     headers: { "Content-Type": "application/json" },
     body: JSON.stringify({ sessionId: captchaSession, completed: true }),
   })
Send a POST request to /verify-slider. In the request body, we specify:
sessionId – the session ID.
completed: true – indicates that the user has dragged the slider all the way to the end.
9. Process the response
If the server returns success: true:
- A success message is displayed.
- The button changes color.
- The CAPTCHA is considered completed.
If the server returns an error:
- An error message is displayed.
- The slider is reset.
- A new CAPTCHA is loaded.
     .then((response) => response.json())
      .then((result) => {
        if (result.success) {
          successMessage.style.display = "block";
          errorMessage.style.display = "none";
          button.style.background = "green";
          sliderCompleted = true;
        } else {
          successMessage.style.display = "none";
          errorMessage.style.display = "block";
          button.style.left = "0px";
          fetchCaptchaSession();
        }
      })
10. We can also add request error handling: reset the slider and request a new CAPTCHA:
  .catch((error) => {
        console.error("Ошибка при проверке капчи:", error);
        errorMessage.style.display = "block";
        button.style.left = "0px";
        fetchCaptchaSession();
      });
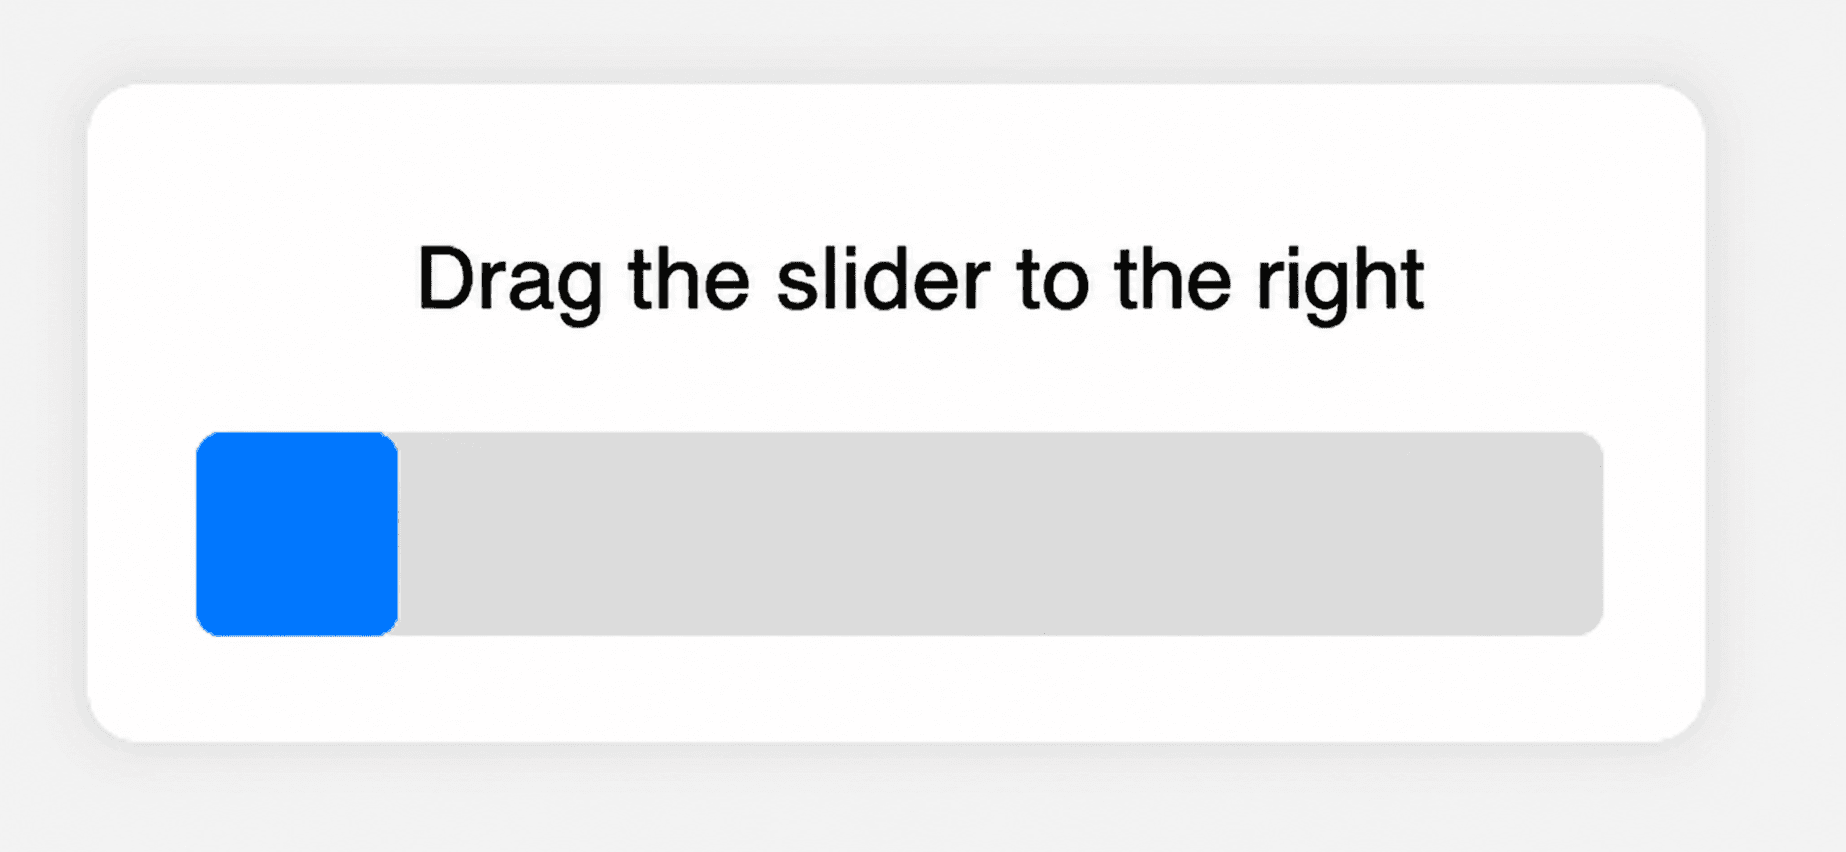
11. The slider did not reach the end. If the user does not drag the slider all the way to the end, it is reset back to the left:
 } else {
    button.style.left = "0px";
  }
});
fetchCaptchaSession();


 Has Been Updated: New Auto-Submit Feature")


: Comprehensive Browser Fingerprint Analysis Tool")
